
New CT Tut for TTDA and Moonshine Dezinez

| Moonshine Dezinez: Autumn Follies | ©Lysisange | ||||||
 |  |
||||||
I am using the gorgeous autumn kit of Moonshine Dezinez called Autumn Follies. This kit is just waiting for your fall and/or earthtone creations. Full of floral elements, trees, leaves, animals and misc items. The scrap kit Autumn Follies has 60 Elements, 10 papers and 3 frames. PU Only.
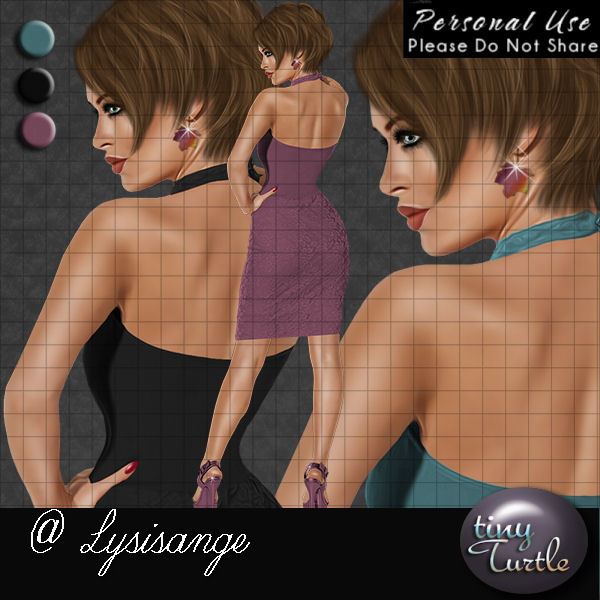
| ©Lysisange - gorgeous tube: Automnia. Tube has 3 layers of dress color and 1 layer of hair color. (Strawberry Blond) Tube is available at Tiny Turtle Designs here |
C/P = Copy Paste / D/S = Drop Shadow default settings: 3 -3 58 7.92 |
Tutorial Instructions

- Open paper 06 Shift + D (duplicate) Close original Promote background to layer
- Apply Mask MD-MaskSet2-3 Merge Group
- C/P pp 2 as new layer - apply mask Miz_Mask_040 Merge Group
- New layer Drag to bottom Flood Fill white
- Open new image 1000 X 1000. We are going to make a floral wreath to go behind the tube. You may choose as many or as few flowers, leaves, etc that you want. I start with R all images 50% and the resize each image individually. There is a screen shot of what I started with and ended up with
- Once you have the flowers arrange to your liking Merge Visible Move image to center of canvas. Copy image and paste on your working canvas. Now back to other canvas R 50% again Apply Mura-Meister Copies default settings. You may need to change the first setting so you get a wreath that you are pleased with. Once this is done C/P wreath to working canvas.
- Duplicate the wreath layer. R 75% Duplicate wreath again R 75%
- C/P frame 03 R 70%. Anchor 1 Duplicate.
- put the smallest wreath layer above this layer So you should have 2 wreaths under the frame and 1 on top of the frame
- C/P tube Move image down until the upper torso is in the frame area and the head above the wreath.
- Erase the bottom layer of the tube that is outside of the frame.
- Move the duplicated frame layer above tube layer. Erase top part of frame that is over the tubes face
- Now open up your swag and place at the bottom left of frame
- C/P E 33 R 80% place on left side below swag layer
- Time to add your elements
- C/P E 10 place bottom left
- E 47 R 68% place on top of E 10
- C/P E 51 place upper right
- C/P E 35 R 50% place bottom right
- C/P E 57 R 72% move bottom off center on right
- C/P e 18 place bottom center
- C/P E 49 R 50% X 2 duplicate a few times place a few around the bottom of the canvas - make different sizes
- Resize entire canvas I resixed 650 X 650 You can make it bigger or smaller depending on your preference
- Close mask layers and white bg Merge Visible Duplicate
- On duplicated layer apply guassian blur setting 3 change blend mode to soft light
- Apply Xero - Clarify default settings
- You are done now except for adding your license number and copyright information
- Add your name and save as png.
- I used cobully script size 72 (for longer names I used sz 60) Applied DSB Bright noise setting at 47. I added a gg with EC 5 impact and added a D/S
 |  |
No comments:
Post a Comment