Showing posts with label AWS. Show all posts

Sunday, January 15, 2017

CT Tutorial: Heart's Desire

CT Tutorial Digi Divas: Heart's Desire


CT Tutorial for Digi Divas.

Hearts Desire is a fantastic PU scrap kit by Angel Wing Scraps for all your Valentine tag needs. This kit comes with 4 tubes by © Angelica S as well as flowers, hearts, buttons, jewelry, and many other elements for a love filled tag. Kit has 122 PNG Elements and 20 papers.
      This kit is available at Digi Divas here , as well as all of her other kits are on sale for $1.00 this month (Jan 2017) and $0.79 on Monday.

C/P = Copy Paste / D/S = Drop Shadow default settings: 3 -3 58 7.92
bg: background, / S/F/D: Select All, Float, Defloat / E or el: Element
R: Resize / Unsharp mask Settings: 3 30 3 (Use after resizing if the image looks grainy or blurry )


I try to write my tutorials as plain and clear as possible, but if I get you confused (and, if I do, I am sorry) you can always refer back to the image we are making for reference. Also, this is just a guideline (I write where I place the elements ) but, feel free to move them around, or add different elements. Have fun and experiment, it is the best way to learn new things.

This tutorial was written by me on 01/15/2017 and is purely of my own making.
If there is any resemblance to any other tut it is purely coincidental. Please do not claim as your own.

Please refer to my TOU on the left sidebar.
I did not use any outside filters for this tutorial
Template available here

You may use a mask of choice or the mask I used by Rachel's Designs: MaskSet140_Mask3 which is available here.


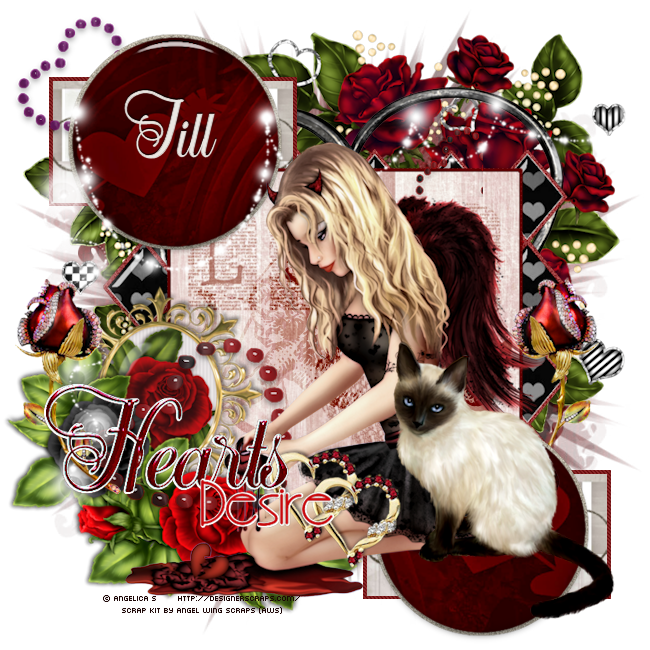
Ok, Let's get started with Tutorial Hearts Desire


  • Open template shift + D Close original.
  • Delete top layer (credit layer)
  • On lge square s/f/d c/p pp 17 into selection. Change blend mode to screen, merge down.
  • Red Circle UL S/f/d C/P pp 10 as new layer R 68% X 2 place so arrow shows within circle - invert clear
  • C/P pp10 as new layer Image mirror - mirror horizontal. (this setting is different on some PSP programs, please adjust accordingly) - Choose circle LR - Repeat as other circle.
  • On bottom shape S/F/D C/P pp 5 as new layer R 80 invert - clear.
  • on Pp 19 with selection tool select top part of paper with the drawn hearts. Copy. Back on template Select/float/defloat Bottom rectangle paste into selection. Repeat with the other bottom rectangle.
  • On big square layer C/P E 101 R 50% change blend mode to overlay. Merge Down.
  • Go to layer just below hearts text glitter
  • C/P E 48 R 50% place left side below red circle
  • C/P E 22 R 68% place bottom left
  • C/P E 50 move to far left duplicate mirror horizontal move below lower rt circle so that only part of the stem is visible
  • C/P E 72 place beneath lge square layer - move to right
  • C/P Angelic Tube (2) (©Angelica)R 85% place center bottom
  • C/ P E46 R 82% mirror horizontal place between word arts
  • C/P e19 R 80% Mirror horizontal move to top right move down to bottom layer
  • Duplicate E 19 R 75% move to left of tag
  • C/P Cat 2 (©Angelica) R 78% move to right of tube
  • C/P E 122 move to top of template, move below tube layer
  • C/P E 121 R 62% move to far left
  • Image - Resize all layers checked pixels 650 X 650
  • Canvas size 700X700 center
  • Create new layer above the white background layer - Select All
  • C/P PP14 into selection (or paper of your choice) - deselect I used mask by Rachel's Designs MaskSet140 mask 3. Merge group
  • You can keep your image this size or resize it if you need to.
  • Add copyright info - if you are using the tubes that come with the kit your copyright should look like this:© Angelica S http://designerscraps.com/ . Otherwise add the correct copyright for the tube you are using.
  • Add your name save as pspimage - export as png and save.
I hope that you have enjoyed this tutorial.

Saturday, January 16, 2016

Digi Divas CT PTU Tutorial


PTU tutorial Written by me (Marie’s Designs) on 01/15/2016

This tutorial was written by me. any similarity to any other tutorial is purely coincidental. 
Please do not claim it as your own. All Rights retained to tutorial © Marie's Designs 

Tube: Artist   KiwiBG   Tube: Valentine  - Erika  


This tutorial assumes that you have a working knowledge of PSP.  I used PSP X3 but this tutorial should work with other versions of PSP.
Plug In Eye Candy 5 Impact Gradient Glow
Legend: D/S Drop Shadow unless otherwise stated use these settings:  -6, 6, 62, 6.93 Black
C/P : Copy Paste  E: Element


For Love of Kiwi Forum Set

New 650 X 250 - Select All
C/P pp 25 as new layer -  crop to selection
Select all C/P tube Valentine – Erika by KiwiBG  Move tube down until the face shows, make sure the eyes are toward the top of the canvas.  Crop to selection.  Duplicate image-  mirror.  Change blend mode to multiply.  On the right image change blend mode to soft light.


E 98 C/P as new layer. Move down until the eyes of the tubes can be seen.
E 125 C/P Resize 72% Adjust > Sharpness >Sharpen D/S
E 62 C/P resize 54% Adjust > Sharpness > Unsharp Mask Settings: 3 30 3 D/S Move element to lower left corner. Move down until the top of heart is showing. Refer to tag for reference, if needed.
E 8 C/P resize 54% move to bottom left D/S with these settings:  -6 , 6 (You may use one of the other animals offered in the scrap kit, as per your preference.
E  17 C/P resize by 34% then resize by 42% add D/S move to lower left in front of cat.
C/P tube resize 54% then resize 72% place center and move a little to the right D/S
E 26 C/P resize 54% X2  D/S move to lower left duplicate mirror
E 97 Resize 52%  then resize 58%  Free rotate all layers unchecked L  35.00 D/S
Move to right place below rose layer but high enough up that you can still see the word love.
Layers  New raster layer. Flood fill with #1d1d1d. Select All contract by 10 delete
New layer Select all contract by 3 Flood fill with DEAF4C contract by 3 again and delete On same layer Adjust > add /remove noise >  add noise 52% monochrome checked gaussian 
Add your copyright and license info.
I used the font Fiolex Girls Sz 72 colors same as border with the gray being foreground and the golden color as background. Select all cantract one. Add noise 52, monochrome and guassian checked. Add inner bevel with these settings:


  deselect
Add EC 5 Impact gradient glow tiny double : color #f1e6d0,  #FFFFFF, #770c13
 D/s:  -1, 1, 100,1 black
Export as PNG or jpg


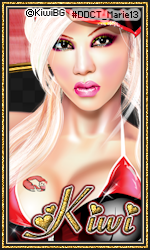
For avatar New 150 X 250 select all
On image we just made, close out the border and copyright layers. Copy merged
Back on avatar C/P  crop to selection.  Border same instructions as previous image except change to contract to 6 and 2 Add copyright and license info. I cheat and copy and paste name and just resize (No more than 75% though or it is grainy, even with unsharp mask. For this one I resized 82%). But, do it how you like.

We are done. I hope that you liked this tutorial and thank you for trying it.