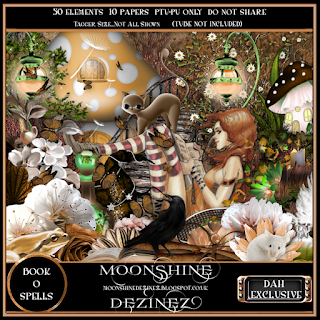
Ct Tutorial for Moonshine Dezinez
Tutorial: Book of Spells
Scrap Kit: Book of Spells

and is a match for ©Mia Hoppers tube Book of Spells
This tutorial was written by me (Marie's Designs) on May 30, 2016 and is my own creation. I ®reserve all rights to tutorial. Please do not claim as your own. Any resemblance to any other tutorial is purely coincidental. I used PSP X 3 to write this tutorial but it should work fine in other versions. This tutorial assumes you have a working knowledge of PSP
Legend:
C/P Copy Paste / ~ D/S Drop Shadow default setting: 3 -3 58 7.92 / bg: background/ S/F/D: Select All, Float, Defloat / E or el: Element / R: Resize / Unsharp mask Settings: 3 30 3 (Use after resizing if the image looks grainy or blurry
I try to write my tutorials as plain and clear as possible, but if I get you confused (and, if I do, I am sorry) you can always refer back to the image we are making for reference. Also, this is just a guideline (I write where I place the elements ) but, feel free to move them around, or add different elements. Have fun and experiment, it is the best way to learn new things.
What we are making:
- Open tube - duplicate (Shift + D). close original
- New image 700 X 700 Flood Fill White (#000000)
- New layer Select all
- Open papers 4 and 7
- C/P pp 7 paste into selection
- Apply mask - Sophisticat Simone Mask 0179
- merge group R 95%
- New layer > select all
- C/P pp 04 into selection - deselect
- Apply mask 59 Sophisticat Simone
- merge group
- Apply Funhouse Streak Mirror: default setting then apply Penta Drag default setting
- If you are using a different tube you can skip the next few steps
- C/P El 04 R 74%
- On tube image copy the full image (Bottom layer)
- On working image - magic wand click outside the frame invert selection
- Selection - contract 5
- Paste image as new layer
- move below the frame layer
- R 85% move image around til you like what you have inside the frame layer
- Selection Invert Clear
- Image - Mirror
- C/P El 34 move above frame layer
- Effects Edge enhance
- change blend mode to screen opacity 50%
- Apply D/S 1 -1 100 Black 0.99
- On the frame layer - Apply this D/S Settings: 2 -2 92 2.97 color: #885309
- El 09 R 50% Move to left move layer below the frame layer duplicate mirror
- Close mask layers, plants (el 09) and white background layer
- Merge Visible R 85% move to top center
- Open all layers.
- Order of El from bottom up: 42, 44, 32, 03, 13, 30, 49, 22, 21, 32, 02, 06, 11, 45, 08, 30, 14
- El 42 R 75% move to left
- E 44 R R 75% X 2 move in front of castle turret
- E 32 R 75% move so it crosses over the bottom of the frame duplicate move to bottom right
- El 03 Resize 75% X 2 move off-center to the right
- El 13 R 50% Move to top right of bridge
- El 30 R 72% Rt side of frame
- El 49 R 62% x2 Move to bottom right of bridge. Duplicate Mirror
- E 22 R 62% bottom right duplicate move under the bridge layer
- E 21 R 50% X 2 place crow on top of castle turret, duplicated mirror move to top of tree on right side.
- If using the same tube I am - On tube image copy top tube layer (just the girl) -If you are using a different tube placement and resize will be different)
- Back on working canvas paste tube as new layer
- R tube 68% place lower right
- C/P E 32 R 75% then 68% move to mid-bottom
- C/P E 02 R 59% X 3 move to lower rt
- C/P E 06 R 50% mirror Lower rt
- C/P E 11 R 68% X 2 lower rt
- C/P E 45 R 68% X 2 lower right
- C/P E 08 R 52% X 3 Lower left in front of bridge
- C/P E 14
- Close mask layers and white bg if you didn't delete it
- Merge Visible R 95%
- open up mask layers
- If you want to resize your tag - do it now
- duplicate - on top image change blend mode to soft light
- Add copyright info and license number if needed
- Add your name and save as png
We are done, woo hoo !! I hope that you have enjoyed this tutorial, have any questions please e-mail me.


No comments:
Post a Comment