Tuesday, May 31, 2016

TTDA - Selisan Al-Gaib

✿¨*•.¸✿¨*• CT for Tiny Turtle Designs Artists *•✿¨*•.¸✿¨


Gorgeous tube from ©Selisan Al-Gaib caria-les. Tube is separate from background. There are 3 layers each with a different hair color. This tube is available at Tiny Turtle Designs here

I paired this tube with 2 different kits by Tiny Turtle Designs: Purple Morning and Floral Nights. Both kits are avaialble at Tiny Turtle Designs


This tube is available at Tiny Turtle Designs here.

My Facebook Fan Page is here

My website is here

Monday, May 30, 2016

Tutorial: Book Of Spells

Ct Tutorial for Moonshine Dezinez


Tutorial: Book of Spells

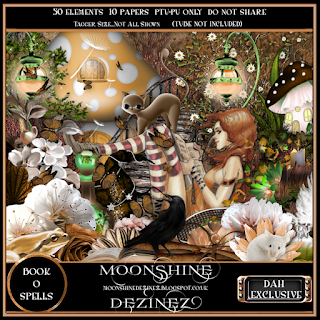
Scrap Kit: Book of Spells
This kit is an exclusive kit for DAH (Digital Art heaven)
and is a match for ©Mia Hoppers tube Book of Spells
Scrap Kit is Available Here

This tutorial was written by me (Marie's Designs) on May 30, 2016 and is my own creation. I ®reserve all rights to tutorial. Please do not claim as your own. Any resemblance to any other tutorial is purely coincidental. I used PSP X 3 to write this tutorial but it should work fine in other versions. This tutorial assumes you have a working knowledge of PSP
Legend:

C/P Copy Paste / ~ D/S Drop Shadow default setting: 3 -3 58 7.92 / bg: background/ S/F/D: Select All, Float, Defloat / E or el: Element / R: Resize / Unsharp mask Settings: 3 30 3 (Use after resizing if the image looks grainy or blurry

I try to write my tutorials as plain and clear as possible, but if I get you confused (and, if I do, I am sorry) you can always refer back to the image we are making for reference. Also, this is just a guideline (I write where I place the elements ) but, feel free to move them around, or add different elements. Have fun and experiment, it is the best way to learn new things.

Filters needed:
Funhouse: Streak Mirror: Available here
Penta.com : Drag Available here

Masks 59 and 0179 By Sophisticat Simone Available here

Font used: Madelina ( This is a pay font that is part of a bundle) Available here

What we are making:


Okay let's get started with the tutorial. Thank you for visiting my blog and trying my tutorial


  • Open tube - duplicate (Shift + D). close original
  • New image 700 X 700 Flood Fill White (#000000)
  • New layer Select all
  • Open papers 4 and 7
  • C/P pp 7 paste into selection
  • Apply mask - Sophisticat Simone Mask 0179
  • merge group R 95%
  • New layer > select all
  • C/P pp 04 into selection - deselect
  • Apply mask 59 Sophisticat Simone
  • merge group
  • Apply Funhouse Streak Mirror: default setting then apply Penta Drag default setting
  • If you are using a different tube you can skip the next few steps
  • C/P El 04 R 74%
  • On tube image copy the full image (Bottom layer)
  • On working image - magic wand click outside the frame invert selection
  • Selection - contract 5
  • Paste image as new layer
  • move below the frame layer
  • R 85% move image around til you like what you have inside the frame layer
  • Selection Invert Clear
  • Image - Mirror
  • C/P El 34 move above frame layer
  • Effects Edge enhance
  • change blend mode to screen opacity 50%
  • Apply D/S 1 -1 100 Black 0.99
  • On the frame layer - Apply this D/S Settings: 2 -2 92 2.97 color: #885309
  • El 09 R 50% Move to left move layer below the frame layer duplicate mirror
  • Close mask layers, plants (el 09) and white background layer
  • Merge Visible R 85% move to top center
  • Open all layers.

Delete your white layer now. Now onto adding the elements

  • Order of El from bottom up: 42, 44, 32, 03, 13, 30, 49, 22, 21, 32, 02, 06, 11, 45, 08, 30, 14
  • El 42 R 75% move to left
  • E 44 R R 75% X 2 move in front of castle turret
  • E 32 R 75% move so it crosses over the bottom of the frame duplicate move to bottom right
  • El 03 Resize 75% X 2 move off-center to the right
  • El 13 R 50% Move to top right of bridge
  • El 30 R 72% Rt side of frame
  • El 49 R 62% x2 Move to bottom right of bridge. Duplicate Mirror
  • E 22 R 62% bottom right duplicate move under the bridge layer
  • E 21 R 50% X 2 place crow on top of castle turret, duplicated mirror move to top of tree on right side.
  • If using the same tube I am - On tube image copy top tube layer (just the girl) -If you are using a different tube placement and resize will be different)
  • Back on working canvas paste tube as new layer
  • R tube 68% place lower right
  • C/P E 32 R 75% then 68% move to mid-bottom
  • C/P E 02 R 59% X 3 move to lower rt
  • C/P E 06 R 50% mirror Lower rt
  • C/P E 11 R 68% X 2 lower rt
  • C/P E 45 R 68% X 2 lower right
  • C/P E 08 R 52% X 3 Lower left in front of bridge
  • C/P E 14
  • Close mask layers and white bg if you didn't delete it
  • Merge Visible R 95%
  • open up mask layers
  • If you want to resize your tag - do it now
  • duplicate - on top image change blend mode to soft light
  • Add copyright info and license number if needed
  • Add your name and save as png

We are done, woo hoo !! I hope that you have enjoyed this tutorial, have any questions please e-mail me.

My Website
My Facebook Fan Page
My Blog

Wednesday, May 25, 2016

PTU Tutorial A Pirate's Life

Dual CT For Digi Divas and AKPKC

Tube by ©Natalia NZ: Paramela     Kit by Ally Cat's Purrfect Kit Creations: Ariel
Poser available here
Scrap Kit available here
All of Ally's Kits are on sale at Digi Divas for $1 this month (May 2016)
Her other stores are listed at the end of this tutorial.
This tutorial was written by me (Marie's Designs) on May 25, 2016 and is my own creation. I ®reserve all rights to tutorial. Please do not claim as your own. Any resemblance to any other tutorial is purely coincidental. I used PSP X 3 to write this tutorial but it should work fine in other versions. This tutorial assumes you have a working knowledge of PSP
Legend:

C/P Copy Paste / ~ D/S Drop Shadow default setting: 3 -3 58 7.92 / bg: background/ S/F/D: Select All, Float, Defloat / E or el: Element / R: Resize / Unsharp mask Settings: 3 30 3 (Use after resizing if the image looks grainy or blurry

I try to write my tutorials as plain and clear as possible, but if I get you confused (and, if I do, I am sorry) you can always refer back to the image we are making for reference. Also, this is just a guideline (I write where I place the elements ) but, feel free to move them around, or add different elements. Have fun and experiment, it is the best way to learn new things.

What we are making


Filter's used: 
 Ulead particle: available here
Mask: Mask 85 by Sophisticat Simone available here
Font: Pieces of Eight Available here
Word Art available here


  • New 800 X 800 We will resize at end of tutorial if you want a smaller tag
  • Flood Fill white - new layer
  • Selection tool - custom selection settings: Left -0 Right - 800 Top - 400 Bottom - 800
  • C/P paper 13 into selection - Invert selection
  • Copy PP 4 into selection - keep selected
  • Filter - Ulead Particle Cloud at default setting click random until you have a cloud formation that you like apply
  • Deselect
  • Mask 85 sophisticate simon merge group
  • Open Frames 2 and 14
  • C/P Frame 2 C/P frame 14
  • Frame 14 - Image free rotate all layers unchecked R Free: 45.00
  • with magic wand click inside the top frame (frame 14) expand 10
  • New Layer
  • C/P pp 15 move this layer below the first frame Toggle paper and frames layers together
  • Open tube image Duplicate close original image
  • On duplicated image R 25% all layers checked - Copy Tube
  • move tube down until here face is visible within the frame
  • Click inside of the bottom frame layer expand 30 on tube layer invert clear
  • Change blend mode to screen
  • C/P E 78 R 45% X 2 move to left of tube image C/P E 78 again this tine R 52% X 2 move to right of tube (you can choose another fish if you prefer it to this one)
  • C/P E 80 R 50% x 2 mirror move to bottom left of tube
  • Close white and mask layer merge visible - R 85%
  • Open mask layer - move merged frame layer up and to the right a little bit

Adding some more elements ~ elements are listed from bottom up

  • C/P E 7 Free rotate Left 45.00 all layers unchecked move to bottom of frame
  • C/P E 68 Move layer behind frame layer move up a bit
  • C/P E 69 place over and down of E 68 move this layer to top
  • C/P E 56 R 68% move to center part of wave
  • C/P E 32 R 68%
  • C/P E 36 move toward bottom
  • C/P E 96 R 72% move to right mirror
  • C/P E 12 R 68% X 2 Move to upper left
  • C/P E 6 R 50% move to top over moon and frame
  • C/P E 42 R 72%
  • E 95 Move to left duplicate mirror
  • C/P E 72 R 72% X 2 move in front of stone tower
  • C/P E 41 R 58%
  • C/P E 28 R 50% mirror move by chest
  • C/P E 99 R 50% duplicate move both in front of chest one to the right and one to the left
  • move the duplicated / mirrored sand layer above this layer
  • C/ P E 25 R 58% duplicate mirror move mirrored image behind stone tower
  • C/P E 58 R 58% X 2
  • C/P tube R 58% mirror
  • C/P E 31 R 50% move to rt side of chest
  • C/P E 35 R 58% move to rt of chest in front of the bottle
  • C/P E 8 R 50% X 3
  • C/P E 10 R 50% x 2 duplicate place one behind the shell we just placed and the other one behind the rock to the right
  • If you are using my word art place it now - there are 3 different sizes I used the small word art on the bottom left of image.
Done except for adding copyright info and name(s)
I used font Pices of Eight size 72 color: #229782/#b6f024 foreground/ background gradient linear A 45 R 1
Save as PNG and you are finished

I hope that you have enjoyed this tutorial, Marie

Ally sells at these stores:
Artistic Dreams Imaging Berry Applicious
Digi Divas Digi Foxs Studio
Digi Graphic Designs  

Saturday, May 21, 2016

New Tutorial Mermaid Ocean

CT Tutorial for Moonshine Dezinez


This tutorial was written by me on May 21, 2016 and is my own creation. I ®reserve all rights to tutorial. Please do not claim as your own. Any resemblance to any other tutorial is purely coincidental. I used PSP X 3 to write this tutorial but it should work fine in other versions. This tutorial assumes you have a working knowledge of PSP

Legend: C/P Copy Paste / D/S Drop Shadow default setting: 3 -3 58 7.92 / bg: background /
E Element / R Resize / Unsharp mask Settings: 3 30 3 (Use after resizing if the image looks grainy or blurry   S/F/D: Select All, Float, Defloat

I try to write my tutorials as plain and clear as possible, but if I get you confused (and, if I do, I am sorry) you can always refer back to the image we are making for reference. Also, this is just a guideline (I write where I place the elements ) but, feel free to move them around, or add different elements. Have fun and experiment, it is the best way to learn new things.


The gorgeous Kit Mermaid Ocean by Moonshine Dezinez was used for this tutorial
This kit is exclusive to Hania's Designs and is Available here
I used the matching tube for this kit by ©Stella Felice which is also available at Hania Designs


Here is what we are making:


Okay onto the tutorial.
I hope you have fun and hopefully learn something new along the way.
Please remember that this is just a guideline and you can make any changes / adjustments that you like.
Doing this will, of course, affect the outcome of your final tag.


Supplies Needed for this tutorial
Xero (Porcelain and Fritillary) FiltersAvailable Here
SBP Flood FilterAvailable Here
EC 5 Impact Gradient Glow and Perspective ShadowAvailable Here
Tiny Double GG By VaybsSetting Here
Font Secret of the OctopusAvailable Here

  • New 600 X 250
  • Flood fill with gradient settings: Foreground: #1a4f5d Background: #bcd6e5 linear 0 0
  • Select All
  • C/P pp 11 as new layer move up until you see the net and water swirls Crop to selection
  • flip Duplicate flip again
  • With selection tool draw out a rectangle at about the top 1/4th of the duplicated image. Edit - Clear
  • With eraser tool erase some of the paper at the clear line - see screen shot for reference - to blend the images. merge down duplicate


  • Duplicate - on duplicated area with selection tool go to custom selection with these settings: L - 300 L 600 top 125 bottom 250 clear select none
  • Custom selection - on same layer - with these settings: Top: 0 B: 125 R: 300 L: 0 Select none
  • Change blend mode to Luminance (l) adjust - blur - guassian blur 3
  • Close this layer for now
  • On bottom layer apply same guassian blur
  • Filter Xero: Fritillary default settings then Xero - Porcelain default settings
  • C/P tube as new layer R 75% Move to far left change blend mode to soft light
  • Open closed layer - this layer should be above the tube layer
  • Flaming Pear: Flood preset with these settings: [ 60 0 57 50 ] [40 50 42 25 color black] [0 33 40 ] refer to ss if needed


  • Filter Xero porcelain default setting
Adding the elements:
  • E 33 R 75% place right of center
  • E 48 R 75% move to left center
  • E 12 R 38% place on far right side
  • C/P tube as new layer mirror resize 50%
  • E 14 R 50% X2 duplicate
  • Place duplicated image on left side of canvas
  • original move in front and toward the top of mermaids mirror
  • Filter - Eye Candy 5 Impact perspective shadow settings with these settings:

    1. Tab: basic
    2. center offset 339
    3. center offset distance 65.76
    4. overall opacity 90
    5. overall blur 0
    6. perspective blur 6.98
    7. fade out 25
    8. reflect selection color and mask selection both checked.
    9. refer to screen shot if needed.

  • merge down (fish and mermaid should be on the same layer)
  • E 18 R 50% X 2 move to left of anchor change blend mode to Luminance (L) and opacity to 80
  • E 11 R 50% x 2 place toward bottom of canvas over bubbles
  • E 10 R 50% move to left bottom duplicate mirror on original grass layer change blend mode to luminance (l)
  • E 36 R 38% X 2 then 75% move to lower rt corner
  • Select 2 colors - 1 dark and 1 light - from your image I used Foreground: #1a4f5d Background: #bcd6e5
  • New layer - select all flood fill with dark color selection contract 2 flood fill with light color contract 2 flood fill with dark color contract 1 clear
  • Filter EC 5 Impact gradient glow with vaybs tiny double - first color should be the light color you used and the last color should be the dark.
  • Finished except for adding your copyright info and names.
  • If you want a tag blank to add names to tag later save as a pspimage after adding your copyright info
  • I used font secret of the octopus. I used the same colors I did for the borders and aded a tiny white gg
  • export save as jpg or png almost done
For avatar
  • On image we just made close teh border and copyright layer - Copy merged
  • New image 150 X 250 Paste as new layer move around until you have an image you like. I made 3 different ones so you can see how versatile and easy this method is
  • Once you have the image you like add a new layer
  • Do border as above except change contract by 2 to contract by 1
  • Add copyright info and name.
  • Save as jpg or png and you are done


Alternate Avatars
   

Friday, May 20, 2016

Ct TTDA ©Chris Pastel

✿¨*•.¸✿¨*• CT for Tiny Turtle Designs Artists *•✿¨*•.¸✿¨


Jessica by ©Chris Pastel avaialble at Tiny Turtle Designs
This tube comes with 5 flowers layers, 2 wings, a jewelry layer and 11 dress layers. Jessica is a beautiful tube in soft pastel colors, perfect for all your spring or floral motifs and beyond.
Tube is available here

I paired this tube with a kit by Tiny Turtle Designs: Pansy Garden which is available here and a kit by Bella C.: Air Romance


©Chris Pastel Tube: Jessica is available here

My website here
My Facebook Fan page is here


Tuesday, May 17, 2016

PTU Tutorial Summer Lovin'

~~ CT Tutorial Digi Divas ~~
Scrap kit     Available here

        Scrap kit Summer lovin' designed by Scrappin' with lil ol' me Cindy out did herself with this gorgeous taggers kit. There are 190 elements, 25 papers at 1000 x 1000 pixels,and 300 dpi. This kit is perfect for all your spring and summer layouts, scrap and tag projects. This kit is Personal Use friendly.
    The tube I used is Jeanette by ©Stan Dudin. This tube is available at PFD. You must have a license and own this tube in order to use it for this tutorial. The font I used is Nouradilla and is a PTU font that is currently available free this week at Font Bundle here


Tutorial Here
Facebook Fan page

Saturday, May 14, 2016

Template 5

I designed this template for a CT tag for Tiny Turtle Designs

Download Template Here

Ct Tiny TTDA Alehandra Vanhek

~~ CT Tiny Turtle Designs Artists ~~
©Alehandra Vanhek: Kate
TTDA Kit Teddy Bear Beach
Available here
Available here
Stunning new tube by © Alehandra Vanhek - Kate. This tube comes with several layers and colors of shorts and jackets. I used the matching kit Teddybear beach designed by Tiny Turtle Designs. Kit has 119 PNG Elements (inc 9 frames) and 19 papers. Primary colors of pink and turquoise. A great kit for any girly, nautical themed tag.

The tube is available here

The scrapkit is available here