Tuesday, June 28, 2016

CT ACPKC Mafia Queen

❥•.¸¸.•*´CT for Ally Cat's Purrfect Kit Creations `*•.¸¸.•❥


New Kit: Mafia Queen This kit is full of casino fun and a little of the mafia underbelly. This kit has 118 PNG Elements, 9 papers, and 15 frames.
I paired this kit with a tube by ©Kajenna (Jocker) This tube is available at Pics For Designs. The other tube I used is ©Arthur Crowe (Nice Boots) this tube is available at his store here as a bonus.


My Facebook Fan Page

Ally Sells at these stores

Artistic Dreams ImagingBerry Applicious
Digi DivasDigi Foxs Studio
Digi Graphic Designs  

Monday, June 27, 2016

PTU Tutorial: Geisha Beauty

❥•.¸¸.•*´CT Tutorial for Ally Cat's Purrfect Kit Creations `*•.¸¸.•❥


Digi Divas Exclusive Kit match for ©Alehandra Vanheks' tube Geisha


This kit has beautiful oriental themed items as well as floral/nature items.
Kit has 99 PNG elements, 5 papers and 6 frames
This kit is exclusive to Digi Divas and is available here.

The matching tube by ©Alehandra Vanhek is also available at Digi Divas here.

Legend


C/P = Copy Paste / D/S = Drop Shadow default settings: 3 -3 58 7.92
bg: background, / S/F/D: Select All, Float, Defloat / E or el: Element
R: Resize / Unsharp mask Settings: 3 30 3 (Use after resizing if the image looks grainy or blurry )

I try to write my tutorials as plain and clear as possible, but if I get you confused (and, if I do, I am sorry) you can always refer back to the image we are making for reference. Also, this is just a guideline (I write where I place the elements ) but, feel free to move them around, or add different elements. Have fun and experiment, it is the best way to learn new things.

This tutorial was written by me on 06/27/2016 and is purely of my own making.
If there is any resemblance to any other tut it is purely coincidental. Please do not claim as your own.

Tutorial Instructions


Plug-in Xero: porcelain Available Here.
Mask by Vix (Mask 287) Available here
Font used Parisian Normal Available Here.


  • New image 800 X 800 FF white
  • Select All New layer C/P pp 1 into selection Apply Vix mask 287 or mask of choice merge group
  • C/P Frame 1 R 72% with magic wand select inside frame selection expand 10
  • New layer move under frame C/P pp into selection
  • Keep selected. C/P tube as new layer R 72% move down until face is inside frame - invert - clear
  • Change blend mode to Luminance (L) Duplicate
  • On duplicated image - guassian blur 5.00 Apply Xero Filter Porcelain default settings changing blue to 0 Change blend mode to screen
  • Close bg layer - merge visible
  • C/P Frame 5
  • C/PE 72 R 72% Edge effects - enhance move to right - duplicate mirror
  • C/P E 28 - move behind frame 1
  • C/P E 77 move down Duplicate R 72% move atop frame 5 layer
  • Working on top layer C/P Tube R 52% then 80% mirror move to left
  • C/P E 44 place to right R 80% mirror move to right of frame
  • C/P E 34 move to bottom center
  • C/P E 27 (cat) R 50% mirror move to right of fountain
  • C/P E 42 R 72% place at top of fountain
  • C/P E 62 move in front of fountain
  • Close white bg
  • Resize after resizing add your copyright/ license info
  • Add your name export as PNG and you are done

Thank you for trying my tutorial. I hope you had fun, Marie

Friday, June 24, 2016

Ct Moonshine Dezinez Secrets

~~ CT For Moonshine Dezinez ~~
New kit in stores: Secret.


This is a great kit full of magical, whimsical items.
Elements are in shades of pink and green. Gorgeous full color backgrounds.
I paired this kit with 2 tubes:
Kristen ©Alehandra Vanhek and Laura by artist ©misticheskaya
Both tubes are available at Pics For Designs

PU Only Scrap Kit
60 Elements
10 Papers
3 Frames
Please Do Not Share


Moonshine Dezinez kits are available at these stores:

Pics For Design (PFD)
Digital Art Heaven (DAH)
Smiley Creations (SCS)
Hania's Designs Store

My facebook fan page is HERE

Wednesday, June 22, 2016

PTU Tutorial At the Beach

New CT Tutorial for Digi Divas


CT PTU Tutorial for Digi Divas - Scrap Kit Seaside Beauty by Jenns Designs

This tutorial was written by me (Marie's Designs) on June 22, 2016.
This is purely my creation and any resemblance to any other tutorial is coincidental.


Jane is a gorgeous new summer tube from © Alehandra Vanhek - she comes with several layers of bikini colors, bikini wrap, jewelry and flower all on seperate layers.

The scrap kit At the Beach by Tagcatz is an absolutely fabulous kit. Summer tagging fun with At The Beach - 96 elements and 8 papers. Not all shown. Tagger size. PU only. Drop shadows on preview only. Both are available at Digi Divas.

Tube is Available here

Scrap kit is Available here
Supplies
I used 2 masks from Rachel's Designs Maskset1-1 and Mask 83-2
they are available here
Filter Xero: porcelain Plug-in is available here


At the Beach

Legend:
C/P Copy Paste / ~ D/S Drop Shadow default setting: 3 -3 58 7.92 / bg: background/ S/F/D: Select All, Float, Defloat / E or el: Element / R: Resize / Unsharp mask Settings: 3 30 3 (Use after resizing if the image looks grainy or blurry

I try to write my tutorials as plain and clear as possible, but if I get you confused (and, if I do, I am sorry) you can always refer back to the image we are making for reference. Also, this is just a guideline (I write where I place the elements ) but, feel free to move them around, or add different elements. Have fun and experiment, it is the best way to learn new things.


Small Frame inside frame Instructions


  • New Image 700 x 700
  • C/P el 55 R 82%
  • C/P El 25 R 82% X 2
  • C/P el51
  • Click inside bottom frame (The blue one) Select modify expand 5
  • New Layer C/ P pp1 into selection
  • Keep Selected
  • C/P tube R 80% move down until you have the face where you want it
  • On tube layer invert clear deselect
  • tube change blend mode to multiply
  • duplicate change blend mode to screen
  • save this image as a psp if you want to, be sure to remember your copyright info
  • Copy merged -

Tutorial Instructions

  • New image 700 X 700 FF white
  • C/P merged frame image close for now
  • New layer Select All C/P pp 5
  • Mask RD Maskset1-1 Merge group
  • Select All new layer C/P pp 4 into selection - deselect
  • Apply mask RD Maskset 83-2 merge group
  • Select All C/P pp 7 as new layer - apply same mask to this layer
  • Merge group - mirror
  • C/P el 2
  • C/P E 30 move to bottom of masked image - duplicate Flip
  • C/P E 29 Free rotate L 90 all layers unchecked move to left - duplicate flip
  • Duplicate again and mirror. Duplicate flip
  • C/P el 60 R 50%
  • The following elements will be placed in or under the frame so please start at raster 3 - which should be el 2 (wheel, waterdrop splash)
  • C/P el 69 R 68% move to bottom right. Duplicate Mirror On mirrored image free rotate R 38.20 Move over bamboo
  • C/P el 83 R 68% X 2
  • C/P el 36 R 68% X 2 Move behind seagull
  • C/P El 31 R 45% place in center of canvas
  • Close white background layer merge visible R 85%
  • Duplicate move down and to the left
  • C/P tube R 32 % move to far left of duplicated frame - with your selection tool draw a rectangle over the part of the tube within the frame - invert delete. deselect
  • Duplicate tube - change blend mode to screen or whatever you like best
  • Merge down R this frame 90%
  • Now we will start adding el above the bamboo frame
  • Open up your framed tube image that we closed at the beginning of this tutorial
  • arrange layer bring to top R 50%
  • move to right lower corner of bamboo frame
  • C/P el 69 R 80% Free rotate L 38.20 place between frames at bottom
  • C/P el 11 R 80% move to right
  • C/P el 15 R 52% move in front of and to left of surfboard
  • C/P tube R 40% Mirror
  • Duplicate X 2 on 2nd layer change blend mode to screen on the top layer Change Blend mode to Multiply add guassian blur 3 - xero - porcelain default settings changing the blue slider to 0
  • If you want a softer look swap the multiply and screen blend mode
  • On the 2nd tube layer - merge down - top tube layer merge down. Now all 3 copies should be on one layer
  • C/P el 4 R 68% x 2 Place at base of surfboard
  • Duplicate Mirror
  • Duplicate again Effects - Image effects Offset setting H 220 V 0
  • Move under dog layer
  • C/P el 77 R 68% mirror
  • C/P el 1 R 50% X 2 duplicate - place one behind right of the dogs. Place other one below and to right of tube layer
  • C/P el 74 R 50% placebetween palms
  • C/P el 23 R 45% move to left in front of tube duplicate mirror place in front of palm frond at the top right of frame
  • C/P el 5 duplicate R 1 of them 50% X 2 and the other 45% X 2 move one to the left mirror the other one and place on right
  • C/P el 64 R 62% move center right
  • C/P El 71 move to bottom
  • Resize now if you want to , close or delete white background layer
  • Close the wordart layer
  • Merge visible R 98% X 2
  • Open wordart layer R 95% X 2
  • Add your copyright info and license number
  • If you want to save it for future use or to make for other people, save as a pspimage
  • Add your name Export - png optimizer and save. you are done

The font I used is called Secrets of the Octopus

Thank you for trying my tutorial I hope that you have enjoyed it. Marie

My facebook fan page

Tuesday, June 21, 2016

PTU Tutorial Seaside Beach

CT Tutorial Digi Divas


CT PTU Tutorial for Digi Divas - Scrap Kit Seaside Beauty by Jenns Designs

This tutorial was written by me (Marie's Designs) on June 20, 2016.
This is purely my creation and any resemblance to any other tutorial is coincidental.
Masks used: (Rachel Designs: MaskSet16_Mask 1 and 2)
Available here

Filter - Funhouse: Mirror Moire
available here

Font used Fanatic Lite
Available here

Tube used is available at Pics for Design (Dolphin Girl ) ©Laguna.
You must have a license and have purchased this tube in order to use it for this tutorial.

Scrap Kit: Seaside Beauty By Jenn's Designs.
This kit is contains 50 seaside/beach Elements ,10 Papers, and a Tube (Chibi Mermaid) Included, Personal Use Only. Please do not share.
Kit is available at Digi Divas here.


Tutorial Instructions – Seaside Beauty


Legend:
C/P Copy Paste / ~ D/S Drop Shadow default setting: 3 -3 58 7.92 / bg: background/ S/F/D: Select All, Float, Defloat / E or el: Element / R: Resize / Unsharp mask Settings: 3 30 3 (Use after resizing if the image looks grainy or blurry

I try to write my tutorials as plain and clear as possible, but if I get you confused (and, if I do, I am sorry) you can always refer back to the image we are making for reference. Also, this is just a guideline (I write where I place the elements ) but, feel free to move them around, or add different elements. Have fun and experiment, it is the best way to learn new things.


  • New Image 700 X 700 FF white
  • Select All C/P pp 1 as new layer - crop to selection
  • Apply Filter Funhouse Mirror Moire with these settings: 15, repeat change to 65
  • Effects - Edge Effects - Enhance
  • Apply MoireMirror filter again changing to 116
  • Duplicate Mirror On duplicated layer change blend mode to multiply
  • On duplicated layer apply mask RD_MaskSet116_Mask1 Merge Group
  • On original paper layer Apply Mask RDMask_maskset116_Mask2
  • Merge Group
  • Merge Down
  • C/P E 21 move to center of canvas then down a little bit (Do not add a D/S to this layer)
  • C/P E 36 Place midway of grass layer (Do not add a D/S to this layer)
  • C/P E 4 R 52% move to upper right (Do not add a D/S to this layer)
  • C/P E 50 R 52% move to center right Duplicate Mirror
  • C/P E 13 R 72% You may need to move the flowers we just placed so they are partially under the frame.
  • C/P E 25 Move down
  • C/P E 10 R 68% move to right lower area of frame
  • C/P E 6 R 52% Free rotate all layers unchecked R 28.52 Move to right over grass
  • C/P E 1 Duplicate R 68% mirror move under grass. the other fish R 82% move to left center
  • C/P Dolphin from tube (if not using the same tube) or Chibi (E 26)
  • Instructions will be for Chibi but if using the dolphin R 32% then R 85%
  • C/P E 26 R 82% X 2 then R 92% place so that you can see the fish behind her
  • With the larger of the 2 fish Anchor 1 - then duplicate move duplicated fish above the mermaid
  • Erase the back part of the duplicated fish - so the fish looks as if it is swimming over mermaid tail
  • C/P E 27 R 62% move at top of mermaid C/P again R 72% move near bottle
  • E 24 (will use this element two more times) place at top of water / sand layer
  • E 9 R 72% move over sand
  • E24 place to right of water under bottle
  • E12 R 78% move to left of frame
  • Apply Funhouse MoireMirror Filter setting at 8 - then repeat
  • C/P E 23 R 62% - move to left
  • E 42 R 62% move to right beneath the 2nd wave layer
  • C/P E 38 move down until the bottom area of plant
  • Back on top layer C/P Tube (If you are using the one I am R 32% then 92% Mirror - move to left ) If using a different tube resize to fit your canvas
  • C/P E 24 (waves ) Move in front center at tip of water
  • C/P E 28 resize 60% duplicate move down below tube layer - place in front of cattails
  • Back on top layer - C/P E 28 R 60% then 80% place to the left of the tube
  • C/P E 18 R 50% move to left Duplicate Mirror R 80%
  • C/P E 46 R 50% move to right Duplicate R 90% mirror
  • Duplicate then R 75% mirror place above shell
  • C/P E 3 R 75% X 2 move to left under shell but above starfish
  • C/P E 2 R 50% then 75% move to right above flip flops
  • C/P E 29 place where you want it
  • C/P E 8 R 42% X 2 move to tip of starfish on the left side
  • C/P E 8 R 42% R 68% Move to right below the flip flops
  • Resize now if you want to
  • Add your license and copyright info
  • Close white bg - save a pspimage
  • Add your name - I used Fanatic Lite at 72 - Foreground: #2ad1e7 / background Gradient Foreground/Background R 0 A 0.
  • Save as PNG and you are done

Thank you for trying my tutorial. I hope that you have enjoyed it and created something beautiful

Thursday, June 16, 2016

PTU Tutorial Country Summer

Country Summer


Tube: Shirley Artist: ©Chris Pastel     Available Here
Scrap Kit Designed by Amy Marie: Country Summer     Available here
Shirley Stunning New Multi-Layered Tube with loads of color options. Comes with Open and Closed Eyes. Personal Use Only. Please Do Not Share.
This is an absolutely stunning kit. Full of shades of pink from the softest pastel to bold, bright pink. There are also some cream and green color elements. 22 papers ans 112 PNG elements. This kit is for personal use only, please do not share it.

CT Tutorial Digi Divas


Supplies / Filters:


Mura Meister – Copies
Xero – porcelain
Filters Available here
EC 5 Impact Gradient Glow Download Settings Here

Mask: Trese Mask 0034 Available here
Font: Demodee Available Here

OK now that you have your filters and supplies let’s get started

Legend:
C/P Copy Paste / ~ D/S Drop Shadow default setting: 3 -3 58 7.92 / bg: background/ S/F/D: Select All, Float, Defloat / E or el: Element / R: Resize / Unsharp mask Settings: 3 30 3 (Use after resizing if the image looks grainy or blurry

I try to write my tutorials as plain and clear as possible, but if I get you confused (and, if I do, I am sorry) you can always refer back to the image we are making for reference. Also, this is just a guideline (I write where I place the elements ) but, feel free to move them around, or add different elements. Have fun and experiment, it is the best way to learn new things.

  • New image 1000 X 1000 (now I know this is large but we will resize ) FF White
  • Link toggle 1 all the below layers
  • C/P E 54 R 50% Mura Meister Copies: Encircle Change Number to 8 Rotate 90 and phase to -45 background color #862020
  • C/P E 51 R 50% Mura Meister Copies : Encircle change Number to 7 Rotate 100 and phase -26
  • C/P E 4 R 50% repeat copies change number to 12
  • C/P E 33
  • C/P E 29 R 50% repeat copies same settings
  • C/P E 1 R 50% repeat copies same settings
  • Apply D/s with these settings: 1 -1 100 1 color: #826020
  • Magic Wand Click inside frame layer (E 33 )
  • Select raster 2 (this should be the first layer of flowers) hit clear
  • C/ P pp 18 paste as new layer – drag to bottom of image - R 72 % invert delete. Deselect
  • Selection tool – Merge Opaque crop to selection
  • Resize 72% all layers checked
  • Image – canvas size 700 X 700 center
  • Keep images link toggled 1 – we will merge them in a bit – but when you move the frame you want everything to move at the same time and place
  • C/ P tube R 72% X 2 , make sure to add your D/S to this layer now Link toggle 1 (this is the last image to link toggle as 1)
  • Magic Wand – click inside 2nd flower layer should be raster 3 Invert
  • on tube layer with eraser tool erase the bottom portion of the tube
  • Duplicate tube Apply Guassian Blur 3
  • Apply Xero Porcelain default settings – changing blue to 0 Change blend mode to screen
  • Merge Down
  • on bottom layer select all then crop to selection
  • move image down a little (make sure all the layers all link toggled 1 except for the white bg layer before moving)
  • Back on top layer
We are not merging yet as I placed elements with in layers of the frame. This kit is chocked full of gorgeous PNG elements so fill free to add as many or as few as you want. These are the ones I added and location on the canvas.
  • C/P E 69 R – 50 X 2 Select All Float Defloat
  • Effects - 3d Buttonize with theses settings 25 25 72 color: #b44c6b keep selected
  • contract 10 invert float defloat D/s 1 -1 100 black then -1 1 100 1 deselect
  • duplicate Image free rotate all layers unchecked R Free 39.22 on duplicated layer free rotate changing to left
  • Move one of the images to the right, the other to left side, place in between rows on frame at different levels. I place the image on the right side under the frame layer and the one on the right under the 2nd flower layer
  • C/P E 50 R 50% then 75% select all float defloat buttonize with same settings
  • Move to bottom center of frame Image free rotate all layers unchecked R 10.70
  • C/P E 26 R 50% move to left on dream image
  • C/P e 75 R 50% bottom right
  • C/P E 14 R 50% lower right
  • C/P E 15 R 75% move to left below jar layer
  • Duplicate mirror image free rotate all layers unchecked left 36.65 Pace below 2nd button layer on frame
  • C/P E 39 R 58% I placed 3 on my image on different layers of frame one to the right, 1 to the left and one to bottom left
  • C/P E 7 R 58% place between swan and dream image
  • C/P E 6 R 58% move to right place under jar, atop rose image
  • C/P E 8 R 58% X 2 I placed 3 in different areas and layers
  • C/P E 92% Duplicate flip move flipped layer to layer beneath all the frame layers
  • The other flower spray R 72% move down to bottom of image
  • Resize now if you want it smaller
  • New Layer drag to bottom – above white layer
  • Select All C/ P Pp 5 into selection
  • New layer C/P pp 2 into selection
  • Apply mask Trese Mask 0034 to both paper layers. Merge group on both layers.
  • Add your copyright and license info
  • If you want a blank to add names to for extra tags save now as pspimage
  • Add your name, I used Demodee Font sz 48 kerning at 65 black. Then added a nice gg ( EC 5 Impact Vaybs tiny double) changing the first color to # ffe7f9, leaving the 2nd color white, and #b43a67 as the last color. Drop Shadow settings 1 -1 92 black
  • Close or delete the white background layer
  • Save image as png – and you are done!

I hope you have enjoyed this tutorial

My Facebook Fan Page is here

My website is here

Wednesday, June 15, 2016

PTU Tutorial American Steam

PTU Tutorial American Steam


Ct Tutorial for Digi Divas

Digicats (& Dogs) is designer of the month at Digi Divas this month (June 2016) . All kits are on sale for only $ 0.99
Scrap kit: American Steam by Digicats (& Dogs). This is a great kit full of patriotic and steampunk elements.

Scrap Kit Available Here

This digital taggers kit is composed of 20 papers and 100 elements, including two posers by @Elisa Designs. There are 10 frames and 20 papers.
American Steam pays tribute to the American Spirit of ingenuity and integrity and captures all the promise, youth, and energy of the Steampunk movement in America.
Legend:
C/P Copy Paste / ~ D/S Drop Shadow default setting: 3 -3 58 7.92 / bg: background/ S/F/D: Select All, Float, Defloat / E or el: Element / R: Resize / Unsharp mask Settings: 3 30 3 (Use after resizing if the image looks grainy or blurry

I try to write my tutorials as plain and clear as possible, but if I get you confused (and, if I do, I am sorry) you can always refer back to the image we are making for reference. Also, this is just a guideline (I write where I place the elements ) but, feel free to move them around, or add different elements. Have fun and experiment, it is the best way to learn new things.

This tutorial was written by Marie's Designs on June 15, 2016. This tutorial is my own idea, any resemblance to any other tutorial is purely coincidental. You can share my tutorials in forums, groups, etc. by linking back to my blog.
                                                Thank you for trying my tutorial, Marie

Tutorial Instructions


Filters Used
  Penta.com - VRT2   Available here
  Xero: Porcelain   Available here

Masks by Dee's Sign Depot
DD_Patriotic Mask 4 Available here
Dee's mask: DD_NGM1_2015_1 here.

Font used: Brushylicious This is a PTU font that is free this week at Font Bundles.
Font Available Here
I used a tube by ©Zlata_M: Araminta.
You must have a license and purchase this tube in order to use it in this tutorial.


  • New image 700 X 700 FF white
  • New Layer Select All
  • C/P pp 01 - crop to selection
  • Load Mask: DD_NGM1_2015_1 Merge Group
  • Select All C/P pp 07 crop to selection
  • Load mask DD_Patriotic Mask 43 Merge Group
  • C/P frame 07 as new layer
  • C/P Frame 06 select area outside of frame invert contract 20
  • C/P pp 04 as new layer R 80% - move this layer down below frame
  • Invert Clear keep selected invert again
  • C/P tube (if using the one I am R 85%) duplicate
  • On tube layer change blend mode to overlay
  • On duplicated layer apply adjust - blur - guassian blur settings: 3.00
  • Apply xero - porcelain default settings changing blue to 0 change blend mode to softlight
  • C/P Blue Swirl anchor 1 - Mirror R 80% move below the tube layers - duplicate
  • Move duplicated swirl above frame - with eraser tool erase parts of swirl to make it look like it is weaved through frame
  • Close mask layers and white bg - merge visible
  • R frame layer 80% Move to upper left of canvas
  • C/P Flower 05 R 42% place at top left of frame - merge down
  • Open closed layers
  • Merge mask layers Apply Penta.com VTR2 default settings
  • Effects - edge effect - enhance
  • C/P firework 01 R 50% move to upper rt under frame
  • Back on top layer
  • C/P Rockets R 50% move to left
  • C/P Flower 03 R 50% x 2 move to left
  • C/P rocket02 R 80% move to right
  • C/P tube R 75% move to right
  • C/P Eagle place in center of canvas move below tube layer
  • C/P American Spirit word art (If you aren't an American there is a Steampunk WA also)
  • Move to bottom apply xero - porcelain filter same settings as earlier
  • add a soft white gradient glow (to wordart)
  • C/P musical notes place atop Spirit
  • C/P Gold Star R 40% duplicate R one star another 40% and the other one 58% - duplicate this one
  • Place on either side of word art
  • Close WA layer, wired heart frame and masks
  • Close gold star on right side above word art
  • Merge Visible R 92% Close the merged layer
  • Open up layers below frame - merge visible R 95%
  • Open Wordart and music notes
  • Resize entire canvas now if you want to (I resize to 650 X 650 )
  • Add your copyright info after you have resized
  • Add your name - save as pspimage
  • File - export - PNG optimizer Save

                       Finished. Thank you for trying my tutorial.

My Facebook Fan Page is here

My website is here

Friday, June 10, 2016

Mask set 3


Download Here


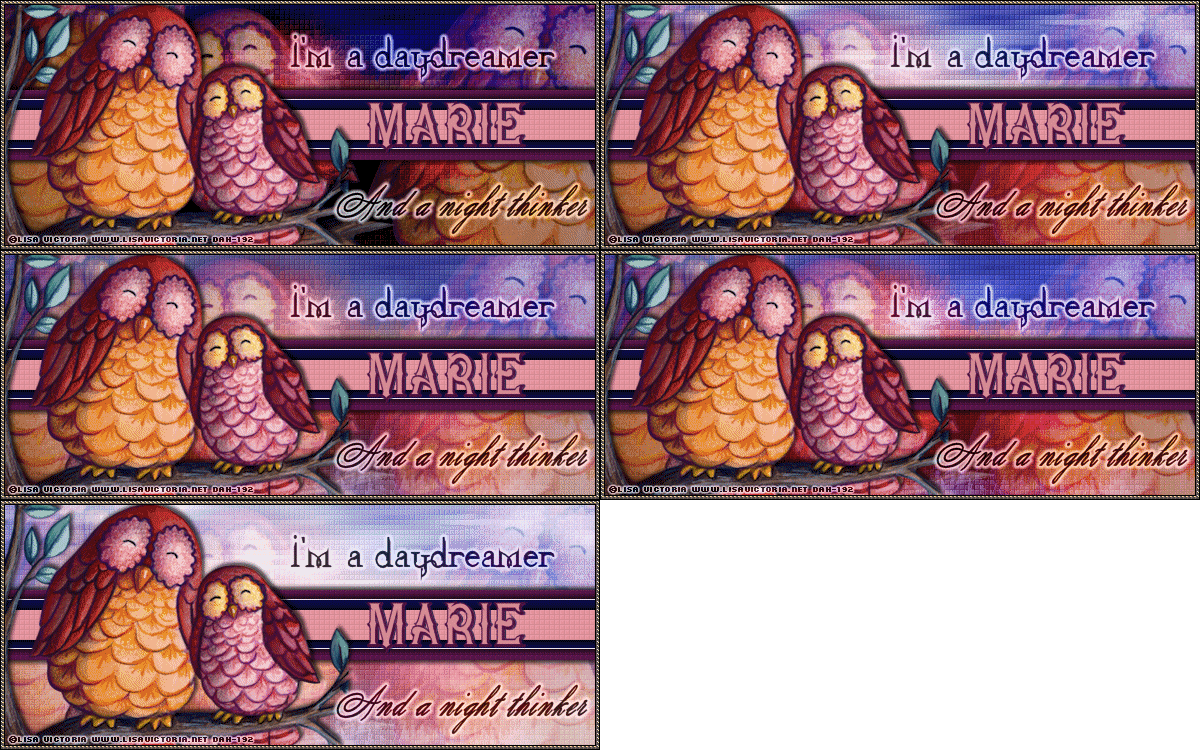
FTU Tutorial Daydreamer

FTU Tutorial: Daydreamer

This tutorial was written by me (Marie's Designs) on June 10, 2016 and is my own creation. I ®reserve all rights to tutorial. Please do not claim as your own. Any resemblance to any other tutorial is purely coincidental. I used PSP X 3 to write this tutorial but it should work fine in other versions. This tutorial assumes you have a working knowledge of PSP
Legend:

C/P Copy Paste / ~ D/S Drop Shadow default setting: 3 -3 58 7.92 / bg: background/ S/F/D: Select All, Float, Defloat / E or el: Element / R: Resize / Unsharp mask Settings: 3 30 3 (Use after resizing if the image looks grainy or blurry

I try to write my tutorials as plain and clear as possible, but if I get you confused (and, if I do, I am sorry) you can always refer back to the image we are making for reference. Also, this is just a guideline (I write where I place the elements ) but, feel free to move them around, or add different elements. Have fun and experiment, it is the best way to learn new things.

I used a tube by ©Lisa Victoria. This tube is available at Digital Art Heaven. You must have a license and purchased this tube to use it. This tutorial works best with a tube with a background image. There are no scraps used on this tutorial.


Supplies Needed Fonts
Xero: FritillaryRapture Heavenly
EC 5 ImpactSplendid Ornamentry
Ulead particleRocket 2 Shadow
Super Blade Pro SNTwist03

I could not find this preset, so if you do not already have it here is an image you can use
Just right click and save as

Okay Let's get started


This is the animated image
  • New 600 x 250 Select All
  • C/P bottom Image into selection
  • Apply Texture - Fur with these settings : Blur: 69 Desity 0 Length 13 Transparency 23
  • Now apply filter Xero: Fritillary at default settings
  • Choose 2 colors from your image. I used #62151a (red) and #2e387b (Blue)
    If you want to add the animation for a day into night look these hues are the best to use
  • Selection Tool - Custom Selection: L 0 Top 125 R 600 Bottom 250
  • New layer FF red Invert selection FF blue
  • keep Selected Ulead particle : Clouds hit random select until you find a setting you like
  • Select none
  • Apply Fritillary same settings
  • C/P tube R 68% move to left - mirror change blend mode to screen opacity 62%
  • Duplicate Move to right edge of tag
  • New Layer
  • Selection Tool custom selection L: 0 R: 600 Top: 90 Left: 160 Select a complimentary color from your image. I chose #58164b Flood Fill Deselect
  • Apply Fritillary Same settings
  • D/S -3 3 70 5.94 black then change V to 3 and H to -3
  • New layer choose a darker color from your image I chose #0b0e43 (A darker Blue)
  • Selection Tool Settings L: 0 R: 600 Top: 100 Bottom: 148
  • Deselect
  • D/s 1 -1 100 white Change V to -1 and H to 1 now add the same D/s as above
  • Merge Down
  • Choose a lighter color from your image. I used #e2949f
  • New layer
  • Selection tool: custom selection L -0 R - 600 top - 110 bottom -140 Flood fill with lighter color
  • Apply Fritillary filter apply d/s
  • Merge Down
  • Add text I'm a Daydreamer ( Font: Rapture Heavenly sz 36 ) black
  • Text: and a Night thinker ( Font: Splendid Ornamentry sz 36 ) black
  • Apply EC 5 Impact subtle white glow - (change radius to 5) to both lines of text. Change blend mode to Luminance (l) opacity at 85%
  • New layer select all Flood fill white contract 4 delete - Apply SBP SNTwist03
  • New layer - select All Fllod fill black contract 1 delete - contract 3 Flood fill black contract 1 delete.
  • Add copyright and locense info.
  • Add name and you are done. (unless you want to animate - then leave your name off)
  • Open animation shop
  • Find raster 2 (this should be the layer that is two different colors)
  • On image in psp change blend mode to Burn
  • Copy merged In AS paste as new animation
  • Back in psp change blend mode to hard light copy merged
  • In animation shop paste after current frame
  • Continue changing blend mode in this in this order
    1. soft light
    2. overlay
    3. Screen
  • There should be 5 frames
  • In AS select all
  • Animation - Frame properties change to 50
  • Save as a MNG file
  • Optimization Wizard: Settings - Better image quality slider at the top
  • Click on Customize Settings: Number of color - 255 colors; create palette by - optimized Octree: Reduce colors by - Error Diffusion Ok
  • Next Next
  • Add name(s) to animation
  • I used font Rocket 2 Shadow for my name
  • Save as (name) gif file and you are done

Avatar

  • New image 150 X 250
  • On banner close the frame layers, copyright info, and background stripe
  • Copy Merged
  • Back on new image paste as new layer
  • Move image around until you have a nice image for your avatar.
  • Merge All
  • Add border same as we did on the banner
  • Add your copyright and license info and name
  • Save as jpg or png as per your preference
All done. Hope you liked this tutorial and maybe learned something new along the way.